Connecting Bugster with GitHub: Automate Your Tests in Pull Requests
Connecting Bugster with GitHub: Automate Your Tests in Pull Requests
Once you have Bugster CLI installed and configured in your project, the next step is connecting it with GitHub to automate test execution in your pull requests. This integration will provide immediate feedback on your code quality without manual intervention.
Why Integrate Bugster with GitHub?
Integrating Bugster with GitHub transforms your development workflow by:
- Running tests automatically on every pull request
- Detecting bugs before merge without manual intervention
- Providing visual feedback directly in GitHub's interface
- Maintaining consistent code quality across the team
- Accelerating the review process with instant results
Prerequisites
Before getting started, make sure you have:
- A project with Bugster CLI already configured (check our installation tutorial)
- Administrator access to your GitHub organization
- A repository with your Next.js project
Understanding the Architecture: Organizations and Repositories
Before proceeding with the configuration, it's important to understand how the relationship between Bugster and GitHub works:
Organization Structure
- Bugster Organization: Your account/organization on the Bugster platform
- GitHub Organization: Your personal profile or business organization on GitHub
- Connection: Each Bugster organization connects to one specific GitHub account/organization
Projects and Repository Structure
- Bugster Project: Each application you test (e.g., "Testing Demo")
- GitHub Repository: Your application's source code
- Linking: Each Bugster project links to a specific GitHub repository
This architecture allows you to have multiple Bugster projects connected to different repositories, all under the same organizational connection.
Step 1: Access the Bugster Dashboard
First, navigate to the Bugster dashboard at https://gui.bugster.dev/dashboard and select your project. You'll see the Overview page with the main configurations.
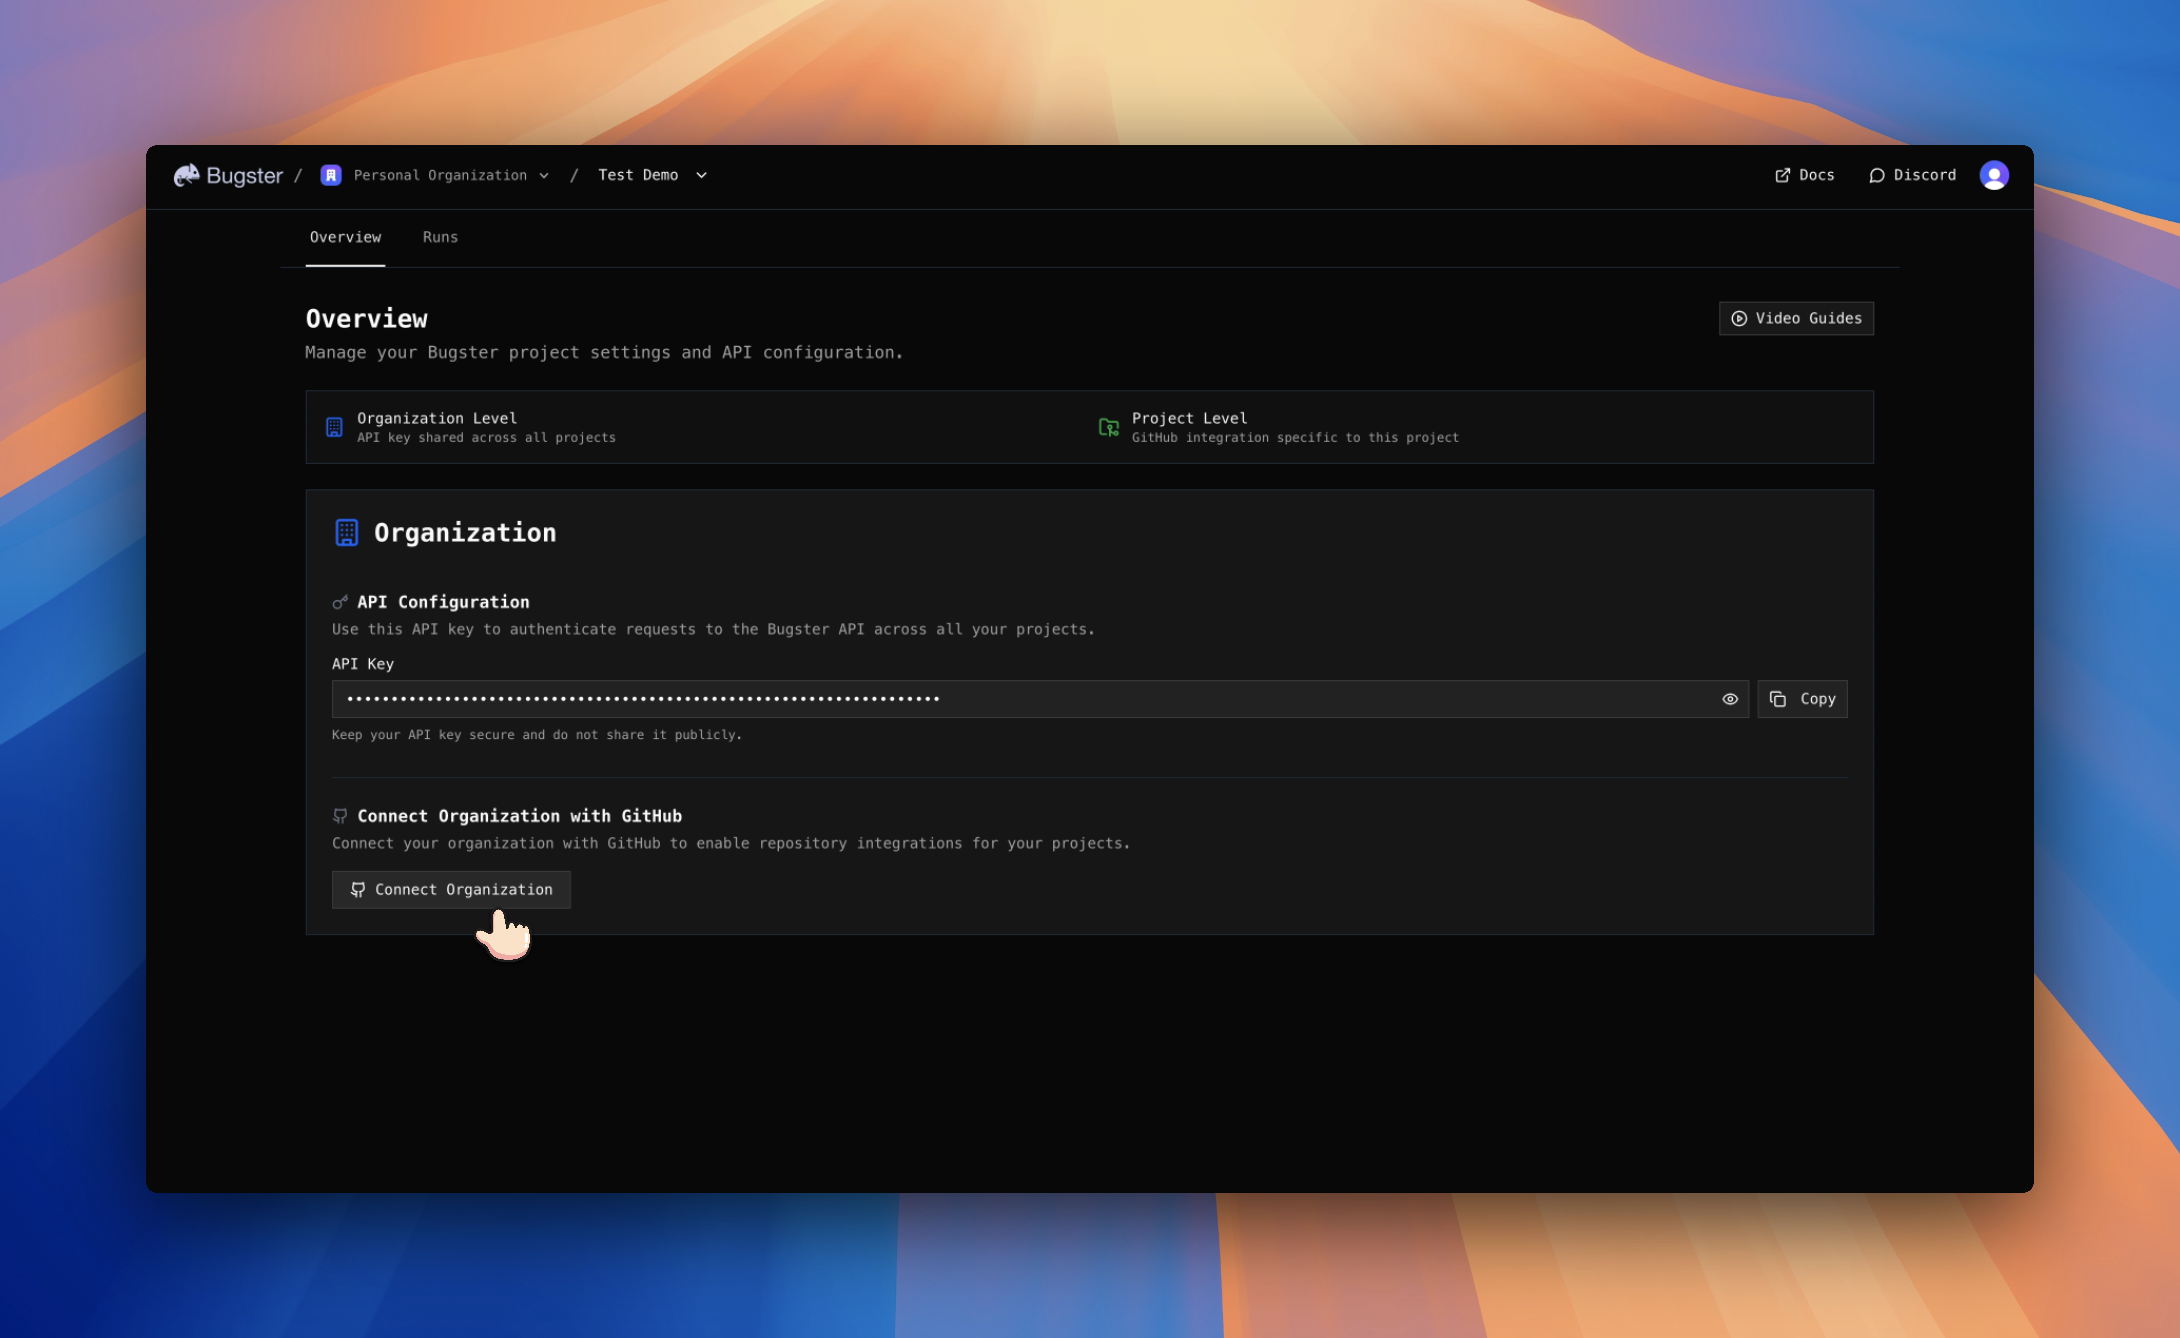
In the Organization section, you'll find two configuration levels:
- Organization Level: API key configuration and GitHub organization connection shared across all projects
Step 2: Connect Your Organization with GitHub
In the "Connect Organization with GitHub" section, click the "Connect Organization" button.
This button will automatically redirect you to GitHub to start the standard GitHub Apps authorization process.
Authorization Process on GitHub
Once you click "Connect Organization", you'll be directed to GitHub where you'll see:
- Account/Organization Selection: GitHub will ask which profile or organization you want to grant access to
- Repository Selection: You can choose specific repositories or give access to all repositories
- Permission Confirmation: GitHub will show the permissions that Bugster needs to function
Permissions Required by Bugster
- Repository read access to analyze the code
- Pull request write access to comment test results
- Webhook access to receive change notifications
Completing the Connection
After authorizing the application on GitHub, you'll be redirected back to Bugster. You'll see that the status has changed to:
✅ Connected - JBautistaBeck (User)
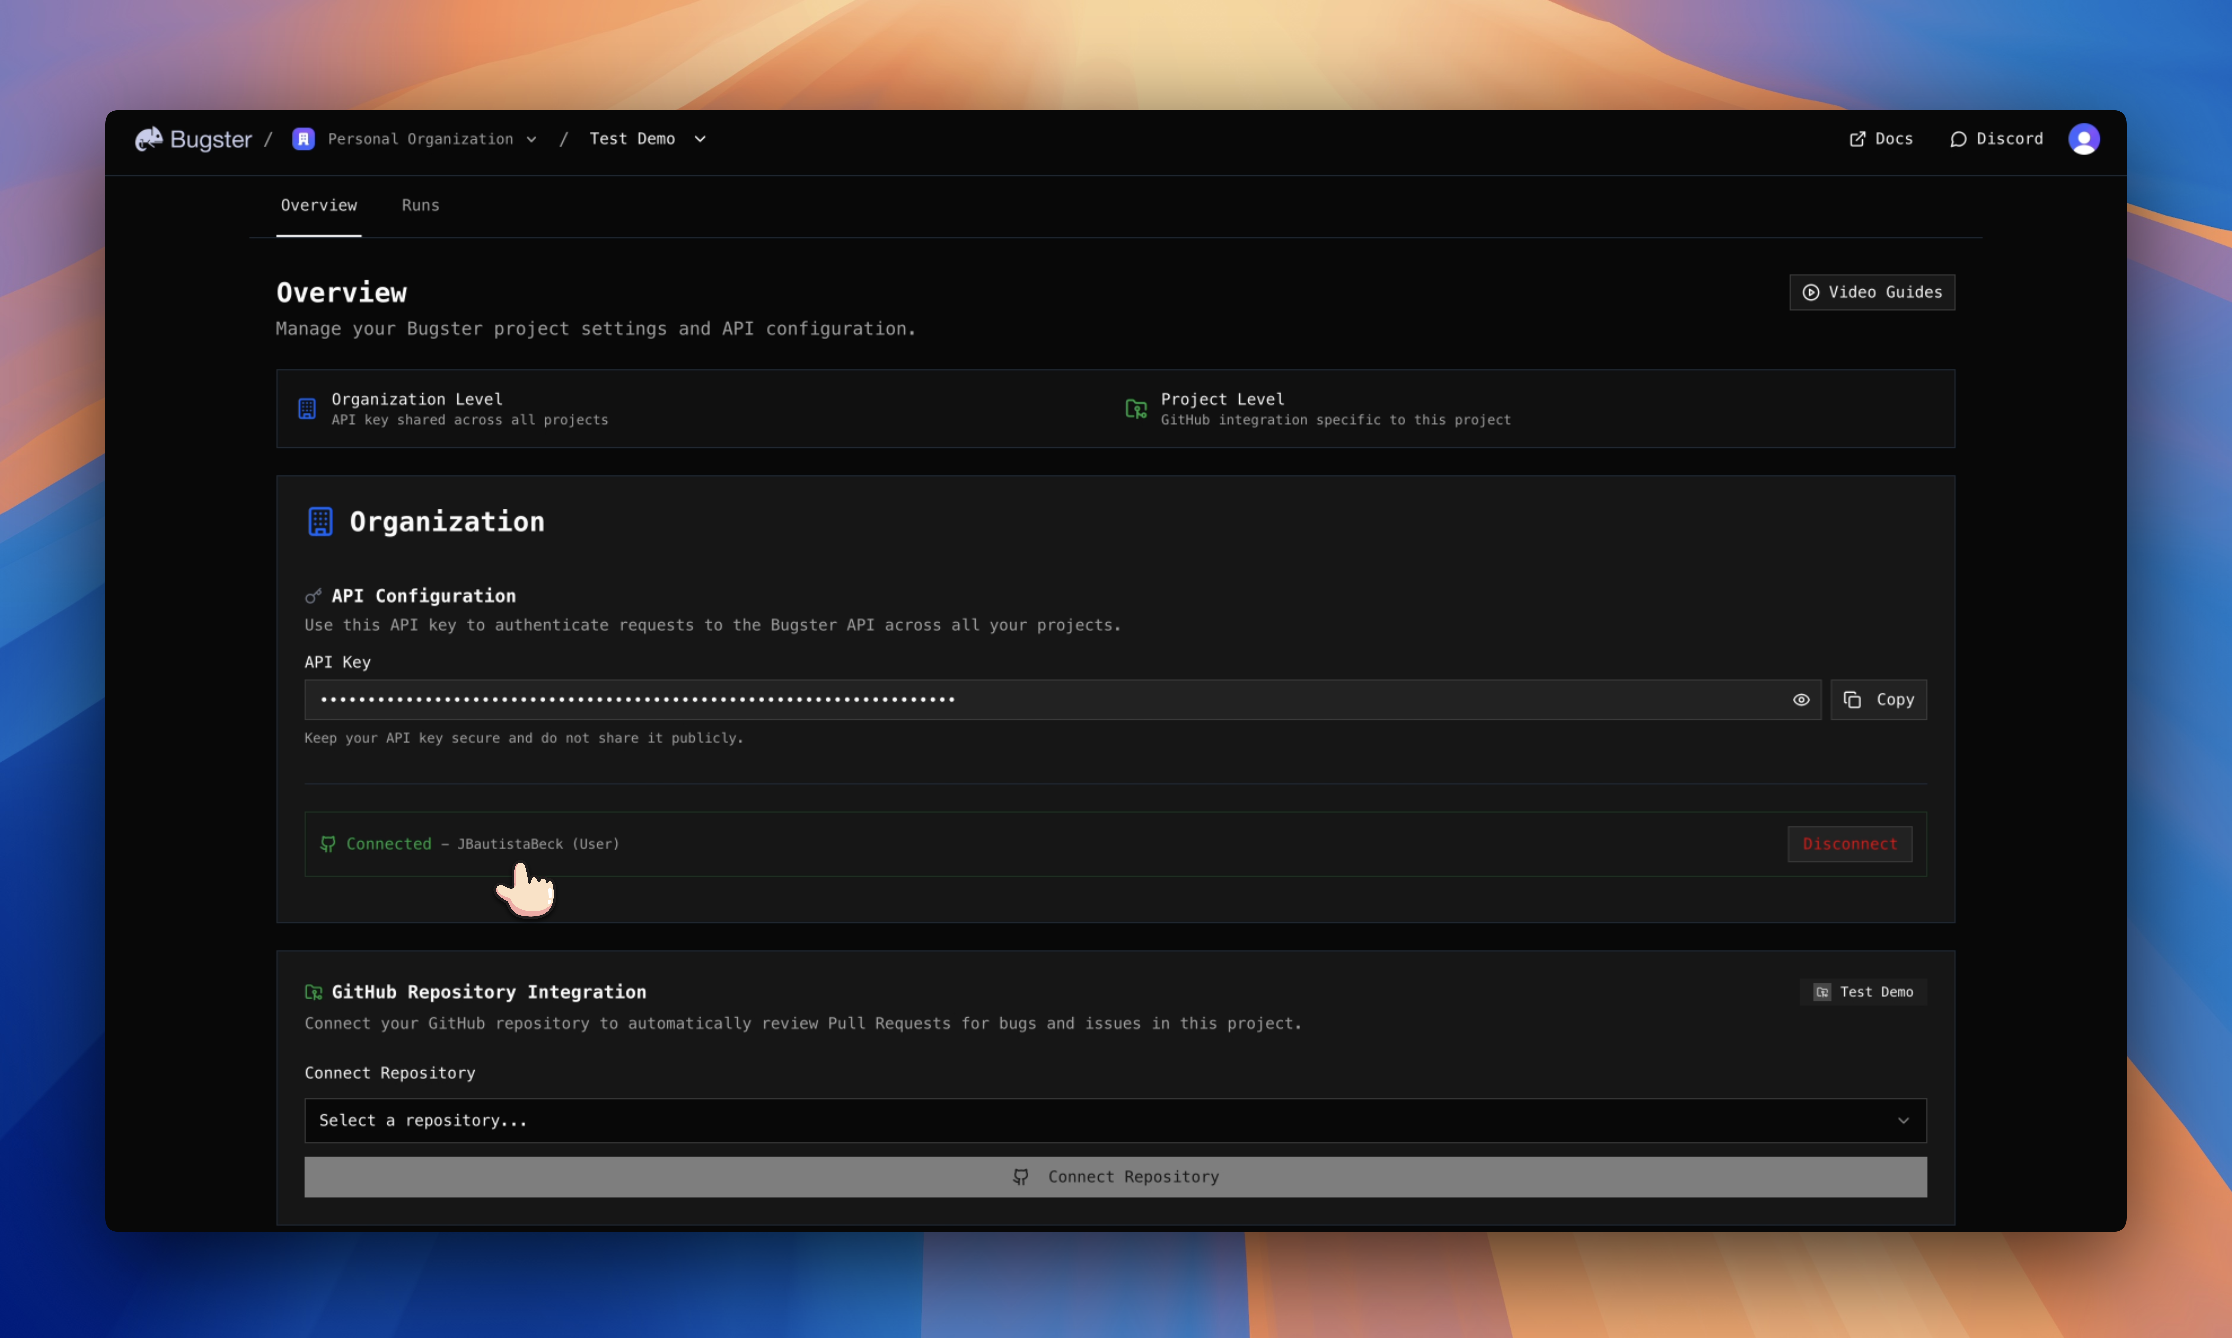
Step 3: Configure the Project Repository
Once your organization is connected, a new section will appear: "GitHub Repository Integration".
This section allows you to:
- Connect a specific repository to your current Bugster project
- Automate Pull Request reviews to detect bugs and issues
Select the Repository
In the "Select a repository..." dropdown, you'll see all the repositories you granted access to during GitHub authorization. Select the repository that corresponds to your project.
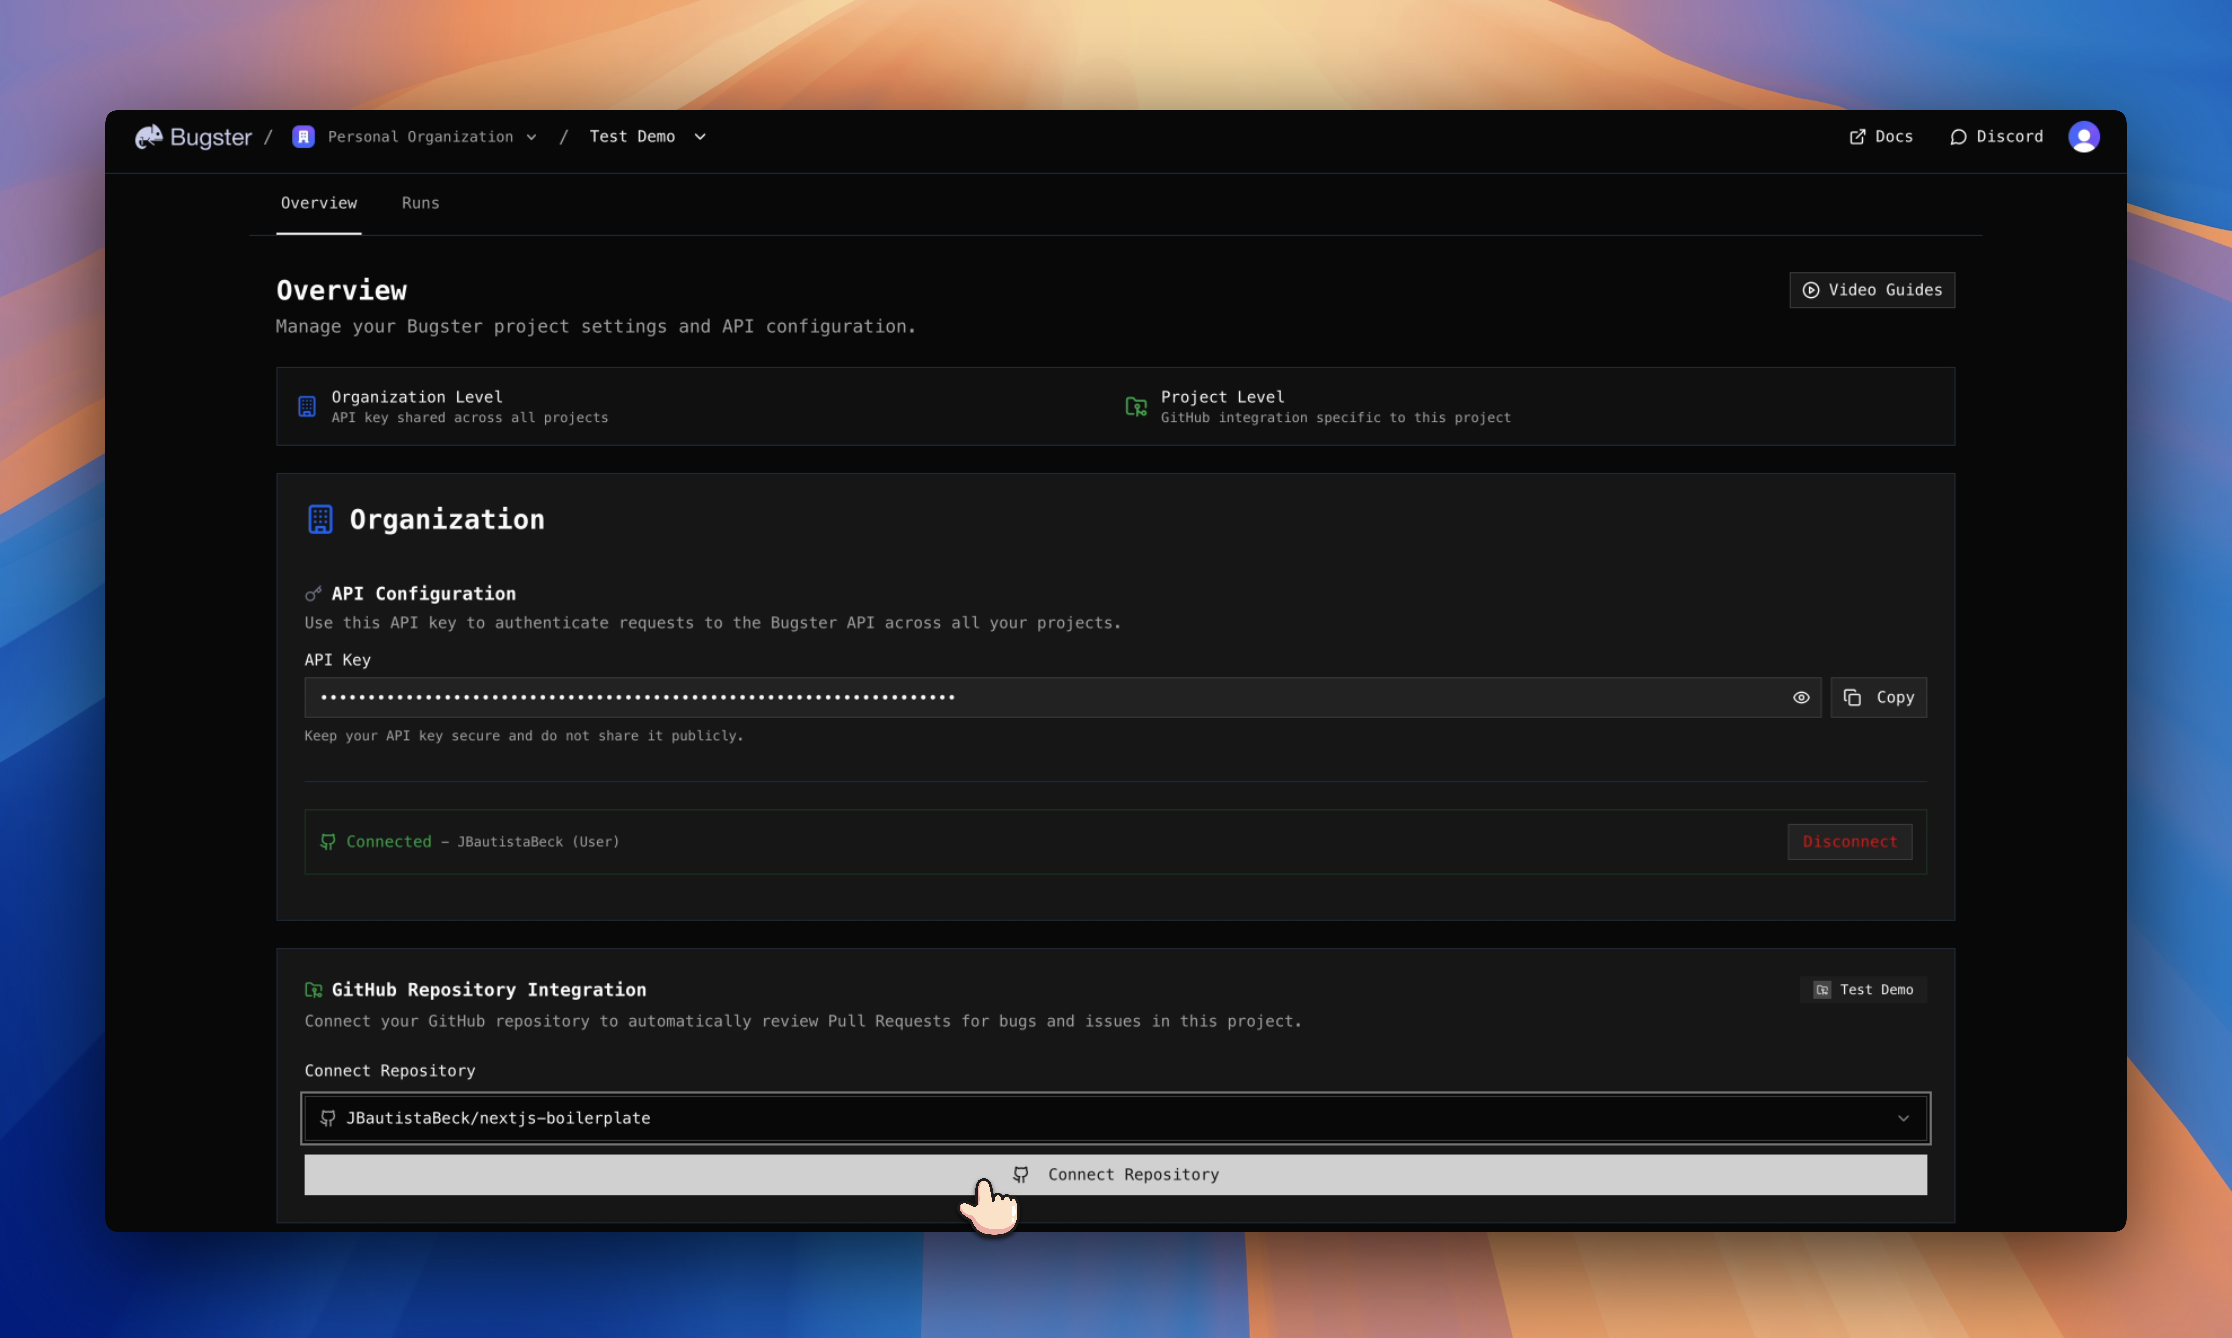
Once selected, click "Connect Repository".
Step 4: Verify Successful Connection
After connecting the repository, you'll see the final configuration:
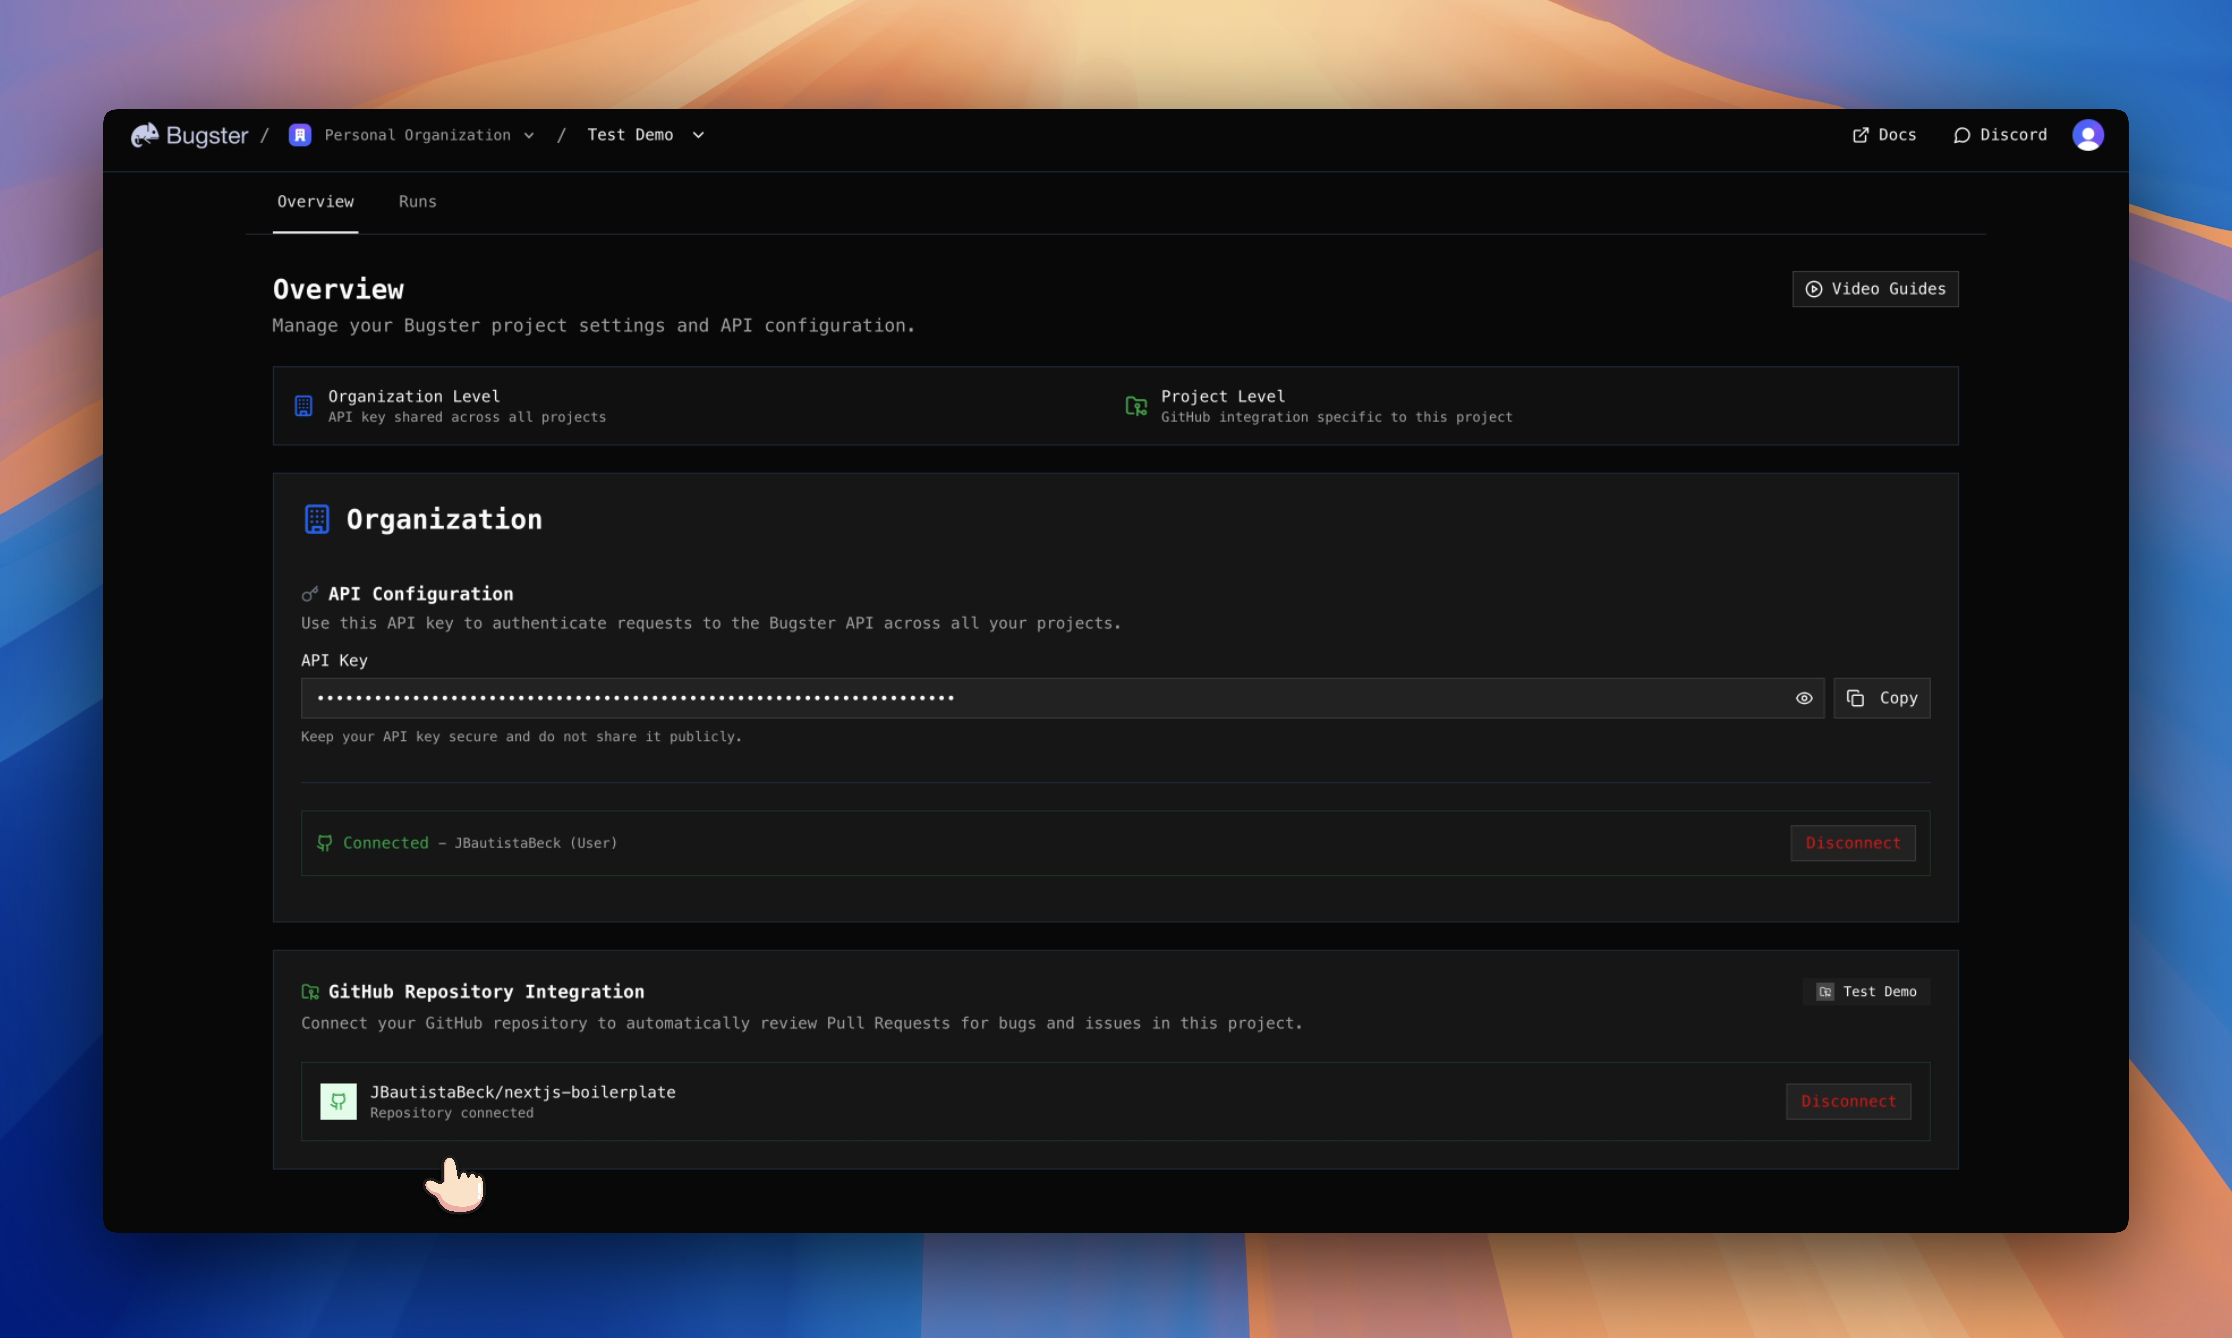
The screen will display:
- Connected organization:
JBautistaBeck (User) - Linked repository:
JBautistaBeck/nextjs-boilerplate - Associated project:
Test Demo
Complete Video Tutorial
To see the entire process in action with a different example, watch our step-by-step video tutorial:
This video shows the complete process from the dashboard to successful repository connection.
What Happens After Integration?
Once the integration is complete, Bugster will start to:
Automatic Monitoring
- Detect new Pull Requests in your repository
- Analyze code changes to determine which tests to run
- Execute relevant tests based on modified files
Pull Request Feedback
- Automatic comments with test results
- Check statuses (✅ passed / ❌ failed)
- Links to detailed reports with execution videos
- Improvement suggestions based on results
Example of Automatic Comments
When Bugster detects a pull request, you'll see comments like:
## 🐛 Bugster Test Results

### ✅ Tests Passed (2)
- Homepage Navigation and Content ✅
- Product Listing Page ✅

### ❌ Tests Failed (1)
- User Login Flow ❌
  - Issue: Login button not clickable
  - [View detailed report](link-to-report)
  - [Watch test execution video](link-to-video)

**Total execution time**: 36.32s
Advanced Configuration
Managing Multiple Repositories
If you have several projects, you can:
- Create multiple projects in Bugster
- Connect each one to its corresponding repository
- Maintain independent configurations for each project
Troubleshooting
Common Issues
"No repositories showing in dropdown"
- Verify you granted access to the correct repositories during authorization
- Make sure you have administrator permissions on the repository
"Tests don't run automatically"
- Confirm the repository is correctly linked to the project
- Verify your project has tests generated with
bugster generate
"GitHub permissions error"
- Check that the GitHub App has the necessary permissions
- Contact your organization administrator if needed
Reconfiguring the Connection
If you need to change the configuration:
- Click "Disconnect" next to the connected repository
- Select a new repository from the dropdown
- Click "Connect Repository" again
Additional Resources
Documentation
Support and Community
- Bugster Discord for questions and support
- GitHub Issues to report problems
Conclusion
Integrating Bugster with GitHub represents a significant leap in automating your testing process. With this setup, every code change will be automatically validated, providing immediate feedback and maintaining consistent application quality.
The flexible architecture of organizations and repositories allows you to scale this integration as your team and projects grow, always maintaining control over what gets tested and when.
Now every pull request will be an opportunity to automatically improve your code quality!
Happy automated testing! 🚀🐛